Introduction
If you’re a Docusign user looking to understand what PowerForms are, why you should use them, and how to set them up, this comprehensive guide is for you. We’ll dive into the details of what PowerForms are, how they function, and the steps you need to follow to implement them effectively.
What is a Docusign PowerForm?
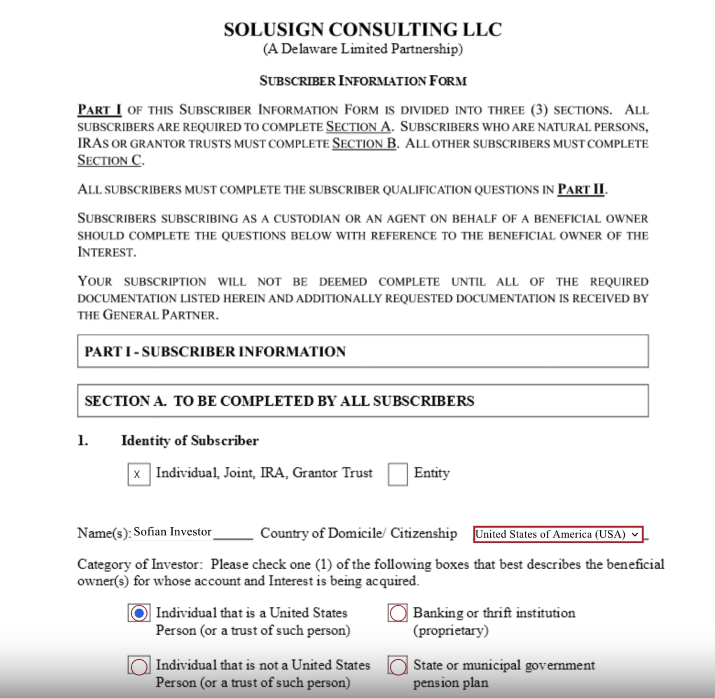
A Docusign PowerForm is an envelope that unknown signers can access and complete without the sender needing to log into Docusign to send the document to specific recipients. Essentially, it’s a self-service document. This means that recipients can fill out and sign the document at their convenience, directly from a URL provided to them. This is particularly useful in scenarios where the sender may not know all the signers’ details upfront or when dealing with a high volume of similar documents.
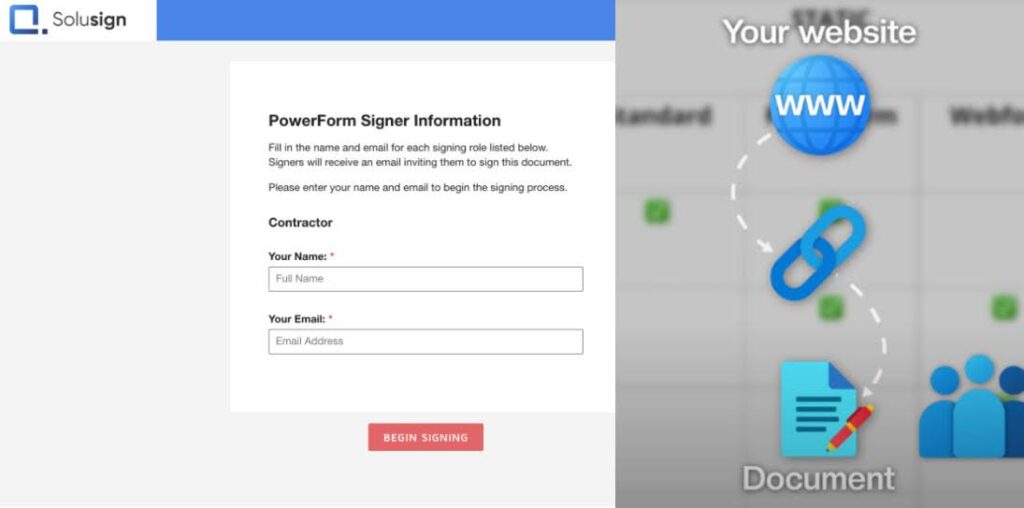
Example of a PowerForm on Solusign.com (this website)
Why Use Docusign PowerForms?
The primary benefit of using PowerForms is the efficiency and flexibility they offer. Here are some scenarios where PowerForms can be particularly advantageous:
1.) Unknown Signers: In many situations, the sender might not know all the signers. For example, an investor agreement may require signatures from additional parties like a spouse or custodian. With PowerForms, the primary signer can provide the necessary information without needing back-and-forth communication.

2.) Self-Service Accessibility: By making documents available through a URL, recipients can access and complete them without needing the sender to initiate the process. This is ideal for forms like loan applications, employee leave requests, or any other standard forms that multiple people need to complete.

3.) Time-Save: PowerForms eliminate the need for the sender to manually enter recipient details and send the documents each time. This automation saves significant time and reduces the chances of errors.

Set Up a PowerForm
Setting up a PowerForm in Docusign involves several steps. Here’s a detailed guide:

Step 1: Create a Docusign Template
Before you can create a PowerForm, you need to have a Docusign template. If you’re unfamiliar with how to create a template, refer to Solusign’s tutorials or download a Docusign Mastery cheat sheet. Templates are essential as they form the basis of your PowerForms, specifying the document structure and where signatures and other information are required.

Create a template in Docusign
Step 2: Define Recipient Roles
Ensure that your template’s recipients have defined roles but do not include static names or emails for the first recipient. The first recipient’s details must remain dynamic as this information will vary with each use of the PowerForm.

Make sure your template’s recipients have assigned roles
Step 3: Configure Signer Permissions
Check that your signers are locked for editing or removal. For instance, if you need the signer’s spouse to provide their details, configure the template to require these details. This step ensures that all necessary information is collected and prevents the recipients from omitting critical details.

Ensure that your signers cannot be edited or removed
Step 4: Create the PowerForm
Once your template is ready and configured, follow these steps to create the PowerForm:
- Save your Docusign template after assigning the roles.
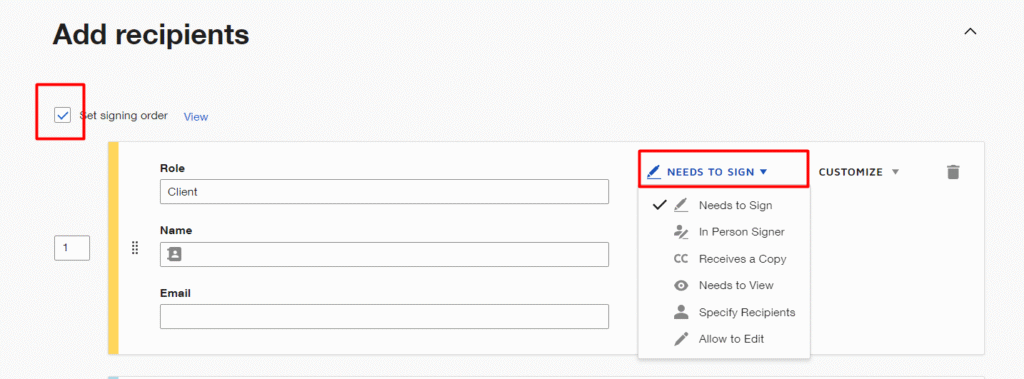
Set signing order and assigned the roles
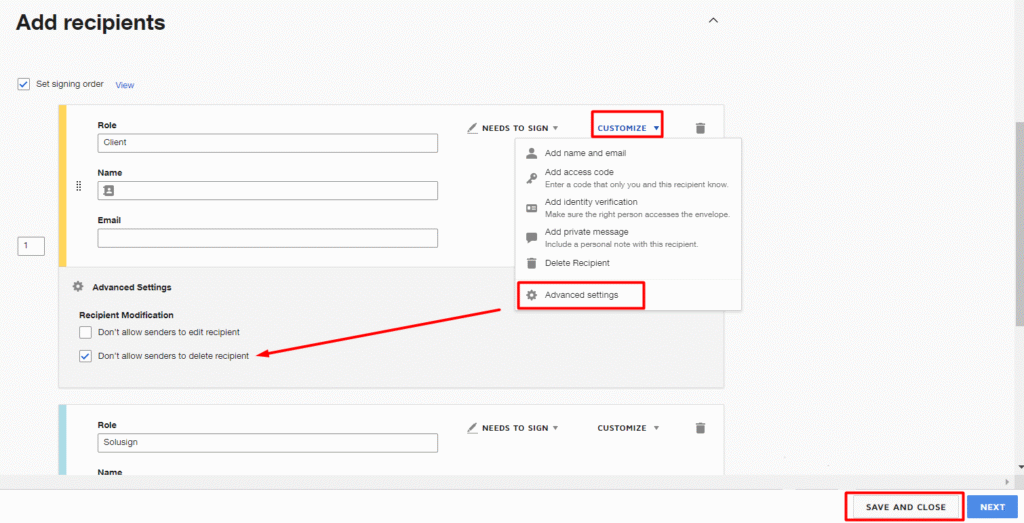
Customize the settings of recipients and Select ‘Don’t allow senders to delete recipient’
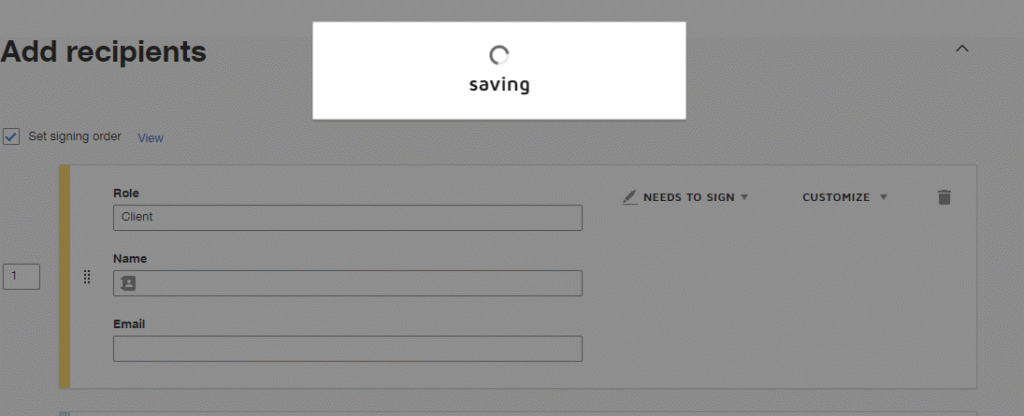
Once your Docusign template is ready, Save it
- Click on “More” and then “Create PowerForm.”
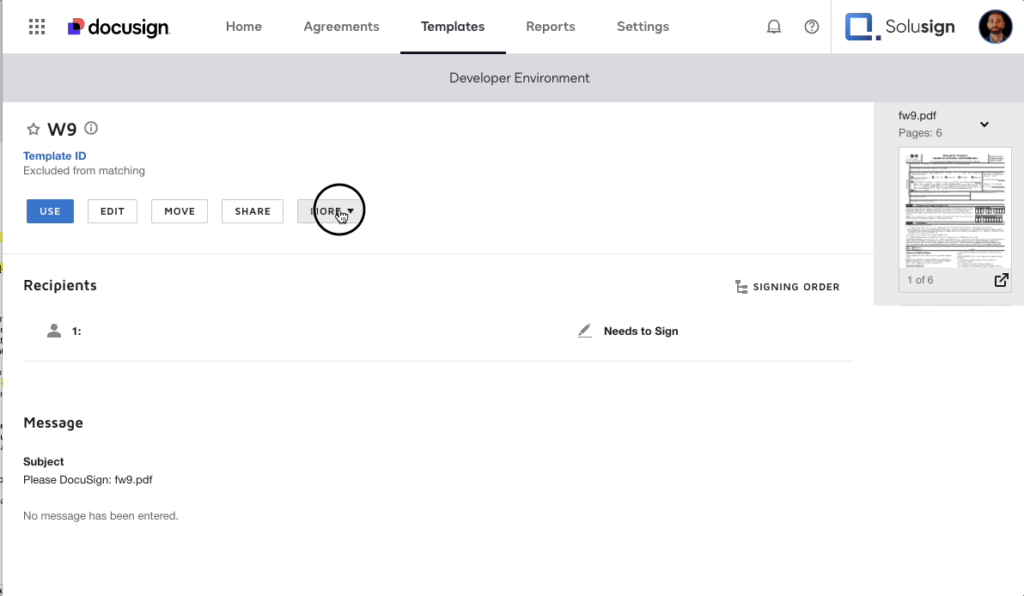
Once your template is set up and configured, proceed to create the PowerForm
- After creating the PowerForm, you will receive a URL. This URL can be embedded in an email or placed on a webpage.
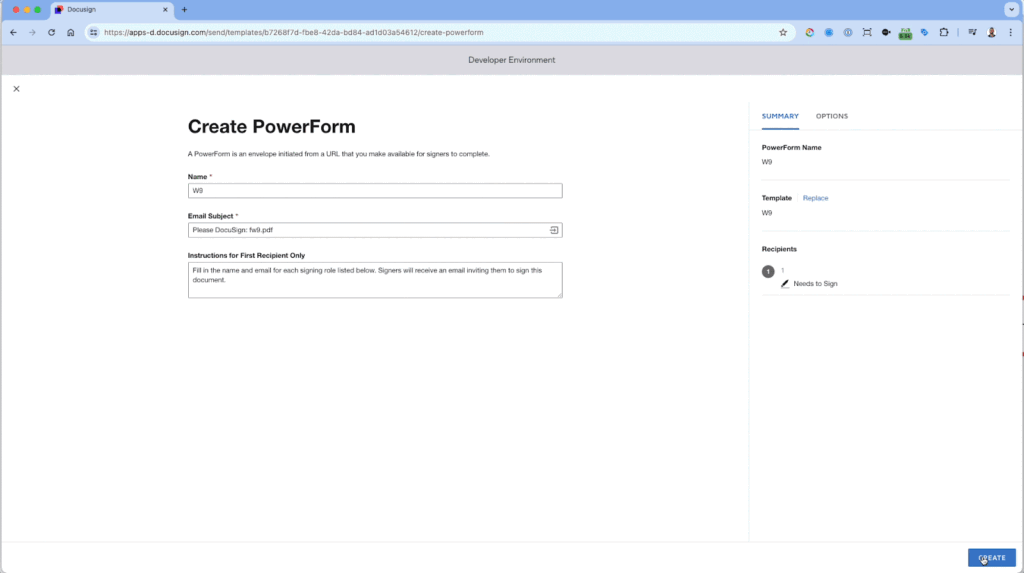
Receiving a PowerForm URL to embed or place on webpage after creation
Use the PowerForm
Recipients can access the PowerForm through the provided URL. Upon accessing the link, they will see a landing page with instructions that you can customize. Here, they will enter the necessary details such as their name and email, along with the names and emails of any additional required signers. Once the information is entered, they can begin the signing process.

Access the PowerForm Through The Provided URL
Limitations of PowerForms
Despite their convenience, PowerForms have notable limitations:
1.) Workflow Variations: PowerForms do not handle workflow variations well. For example, an investor may need to provide additional signatures from a spouse or custodian, but there’s no guarantee they will remember to enter this information. This can lead to incomplete documents and delays.

2.) Room for Error: Because PowerForms rely on signers to follow instructions and provide necessary information, there’s a risk of errors or omissions, particularly in complex workflows.

Implement an Interview-Style Questionnaire
Tools like JotForm can be used to create a questionnaire that gathers all necessary information upfront. Here’s how you can implement this:

- Create a Jotform Questionnaire: Design a form that asks preliminary questions to determine who needs to sign the document. For example, if an investor is signing, the form might ask if they have a spouse or if they are signing on behalf of a trust.
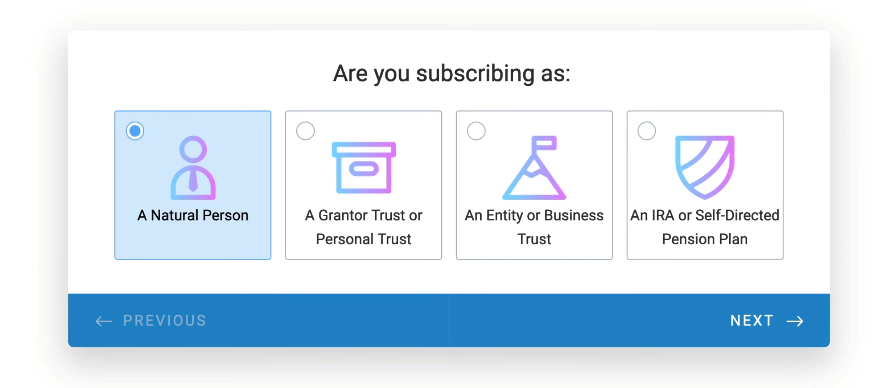
Example of a Jotform Questionnaire Step #1
2. Collect Details: Based on the responses, the form will collect the names and emails of all required signers.

Example of Collecting Details In a Jotform
3. Start the Docusign Process: Once all necessary information is collected, integrate JotForm with Docusign to initiate the signing process automatically. This approach ensures that all required information is gathered before the signing process begins, reducing errors and improving efficiency.
Integrate Jotform with Docusign to start the signing process
Conclusion
Docusign PowerForms are a powerful tool for automating document workflows and enhancing efficiency. By understanding what PowerForms are and following the steps to set them up, you can save time and ensure that your documents are completed accurately and promptly. However, for complex workflows with multiple variations, consider using an interview-style form to gather all necessary information before starting the signing process. This combination of tools will help you create a seamless and error-free document management system.
Incorporating best practices, such as providing clear instructions, testing the process, keeping documents updated, ensuring data security, and gathering user feedback, will further enhance the effectiveness of your PowerForms. If you need further assistance, consider scheduling a strategy session with a document automation expert to explore more tailored solutions for your business needs.
By leveraging the full capabilities of Docusign PowerForms, you can transform how your business handles document management, making the process faster, more efficient, and more reliable for all parties involved.

About the author:
Sofian Saoudi
Founder of Solusign Consulting
He is the founder of Solusign Consulting, an agency specializing in automating document workflows using Docusign. Sofian is a Docusign expert, Developer and Certified Consultant. Sofian is also one of the most active voices in the Docusign community.

