
Introduction
Mail merge is an invaluable feature that allows you to create personalized dynamic documents efficiently. Traditionally, this required third-party software, but now, you can achieve polished results directly within Docusign. This article will guide you through the process of creating mail merge Docusign templates, including setup, configuration, and the best practices.
Explore The Mail Merge Basics
Mail merge is a method used to create multiple documents from a single template by incorporating data from a spreadsheet or database. Traditionally, this was done with software like Microsoft Word combined with Excel. However, Docusign now offers this capability within its platform, streamlining the process. This means you can now create, customize, and send personalized documents without leaving Docusign, saving time and reducing the potential for errors.
Step 1: Set Up Your Word Document Template
Start by creating a Word document template. This template should include all the static text, such as the company logo, title, and signature block.
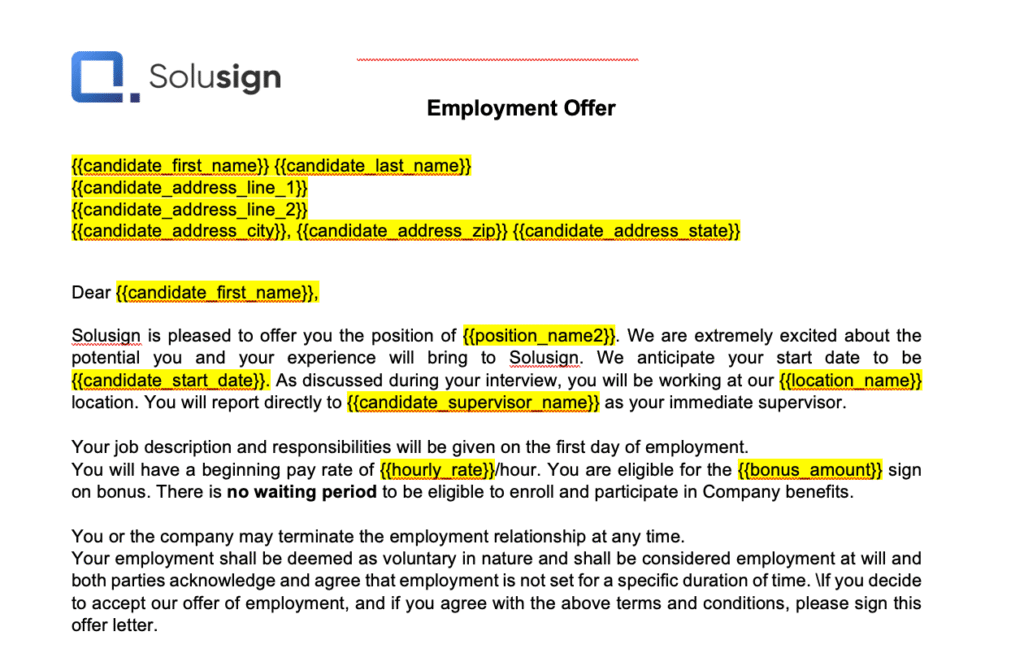
Create a Word template with static elements like the logo, title, and signature block
Identify the variable text by using placeholders, which are marked with double curly brackets (e.g., {{candidate_first_name}}).

Use double curly brackets (e.g., {{candidate_first_name}}) to mark variable text placeholders
For instance, a template for a job offer letter might include placeholders for the candidate’s name, job title, salary, and start date.
A template may feature placeholders for the candidate’s name, position, salary, and start date.
Tips For Creating Placeholder Fields (aka Mail-merge Fields)
There are two ways to create placeholders that will get replaced with variable information in Docusign.
Option 1: Use the Docusign Template Assistant Add-In (recommended)
To streamline placeholder creation, use the Mail Merge Docusign Templates Assistant Add-In for Word. This tool helps insert and manage placeholders accurately, simplifies template management, and reduces formatting errors. It also makes creating conditional rules easier, which will be covered later.
Use the Docusign Template Assistant Add-In to simplify placeholder creation
Option 2: Type placeholders manually
Type placeholders manually
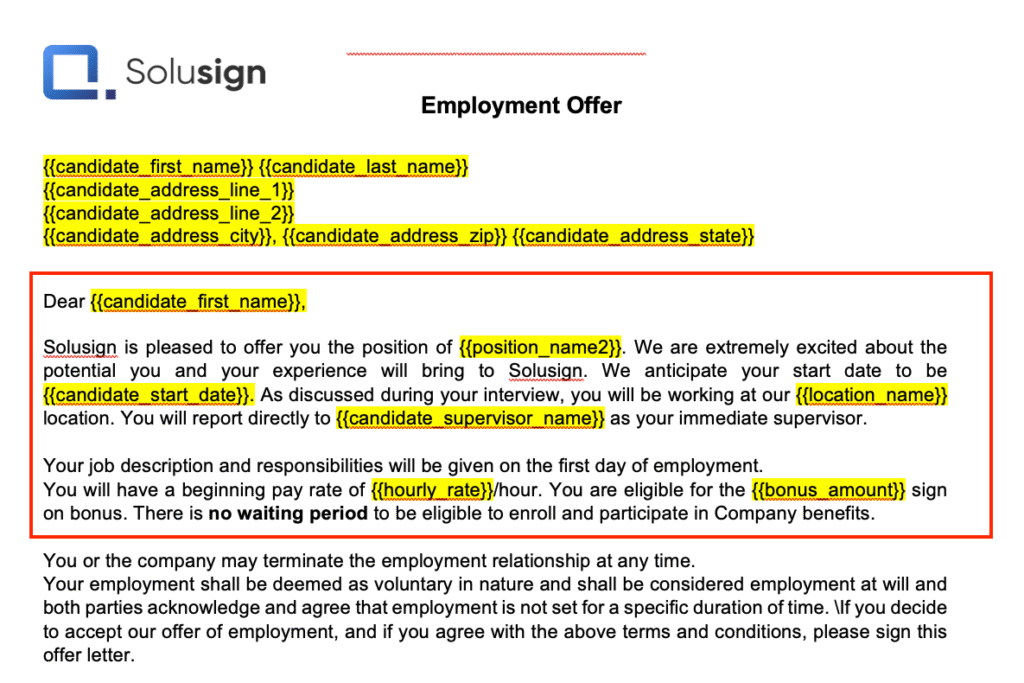
Create Conditional Rules
Docusign’s document generation tool allows you to create conditional rules. These rules will show or hide text based on a condition that is either met or not met. For example, if employment is offered to a candidate under the condition that this candidate obtains a work visa, a specific paragraph will be included; otherwise, it will be hidden for candidates who don’t need a work visa. This feature simplifies template management and ensures personalized documents. Conditional rules enhance the flexibility of your templates, allowing you to tailor content to different scenarios without creating multiple templates. Conditional rules can be easily created using the Word Add-in.
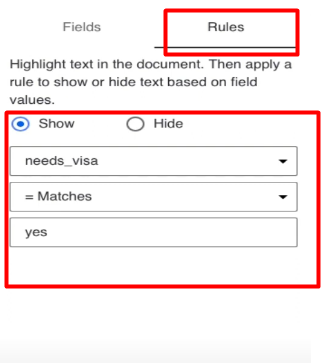
Rules allow to show or hide text dynamically based on other field values
Step 2: Turn Your Word Template into a Docusign Template
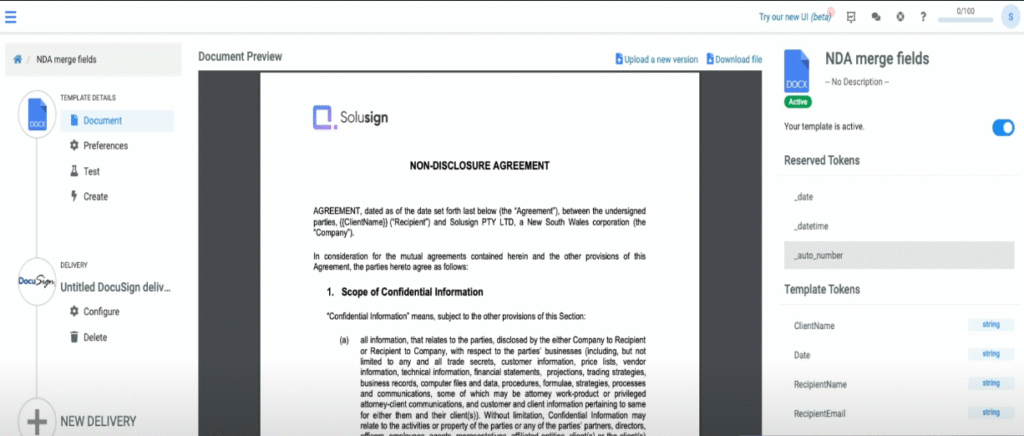
Once your Word template is ready, upload it inside a Docusign template.If you need help creating a Docusign template, you can follow this tutorial. Docusign will recognize the placeholders such as {{candidate_first_name}} and will show a ‘Document Generation’ label on the thumbnail of the document. Later on, when you’ll want to use the template to generate documents, Docusign will prompt you to provide data that will replace those placeholders.
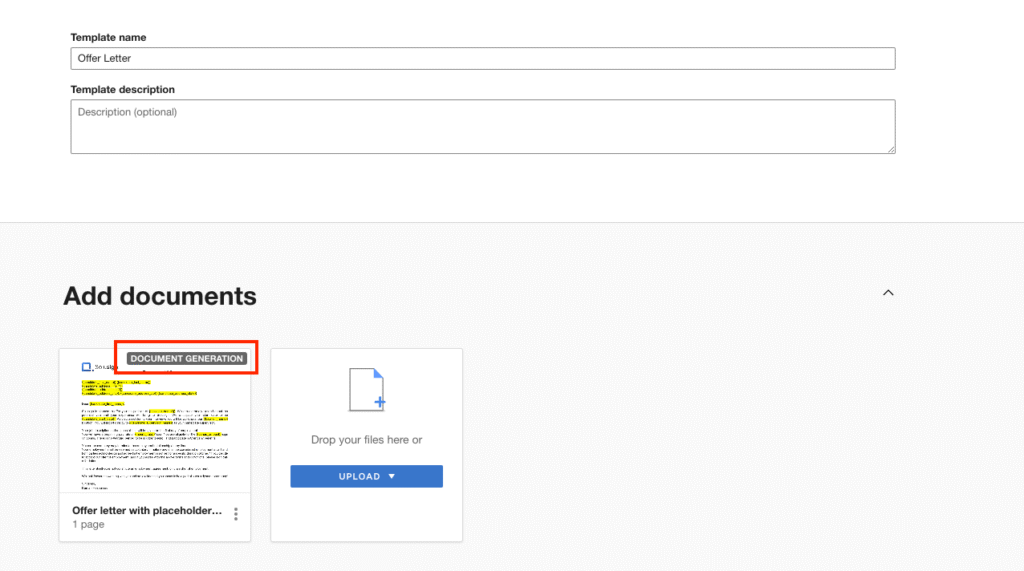
Upload your completed Word template to Docusign
This step is crucial as it ensures that Docusign understands where to insert dynamic data. Before the upload process, review the document to confirm that all placeholders are correctly formatted. Docusign will not recognize your placeholders if the syntax isn’t perfect. For example, if you write {candidate_first_name}, Docusign will not recognize this as a placeholder since it doesn’t contain double curly brackets. This verification step helps prevent any issues during the mail merge process.
Use Docusign Anchor Texts to Place Docusign Fields Automatically
For documents with dynamic content, use anchor text to ensure your Docusign fields like signatures are always placed in the right location.
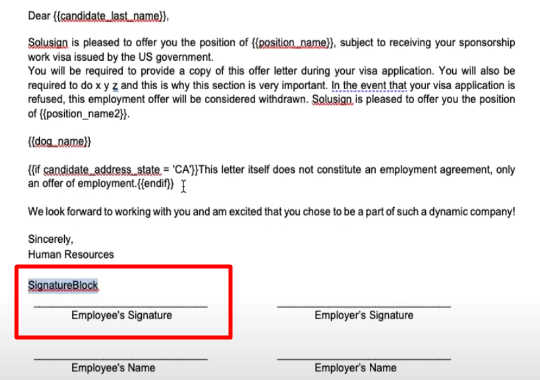
Use anchor text to accurately position dynamic fields like signatures
Anchor text acts as a hidden landmark, ensuring that fields remain correctly positioned regardless of the document length. This step is crucial for maintaining the integrity of the document layout. Proper placement of fields ensures that your documents are not only accurate but also easy to read and sign. For training purposes, we’ve made the anchor visible in the screenshot above. However, it’s usually best to hide the anchor from signers. To do this, set the text font color to match the document’s background color, typically white. This will make the anchor invisible to human eyes while still allowing Docusign to locate it.
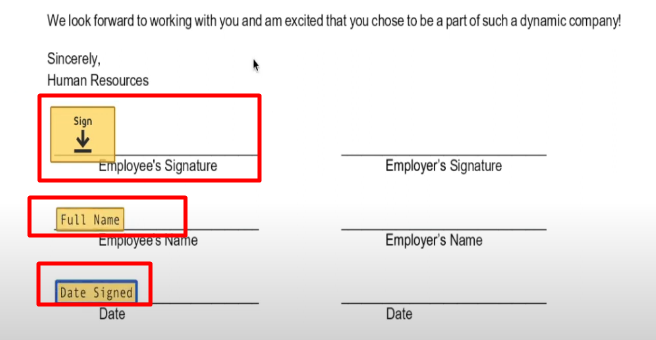
Anchor text keeps fields properly positioned
Configure the Template in Docusign

In Docusign, configure your template by adding the necessary signature fields and setting up AutoPlace using your hidden anchor text for these fields. This setup will determine how your document appears once merged with your data. This meticulous configuration ensures that the final document maintains a professional appearance.
Step 3: Use your Mail Merge Docusign Template
There are two ways to use your template. The first option is to use the DocuSign web interface, and the second is to use an automated integration. Start with the first option to get familiar with the process, but consider planning for integration to save time, reduce errors, and avoid headaches.
Option 1: Generate Documents Manually
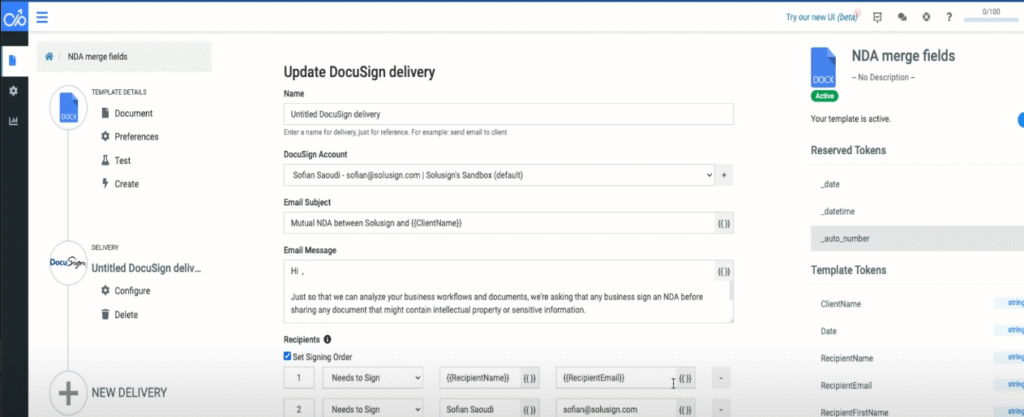
If you prefer a manual approach, fill out the fields directly in Docusign. This method is straightforward but can be time-consuming if you have many documents to generate. From your templates list, choose the template you’ve just built and then click use. This screen will prompt you to enter that will replace the placeholders such as {{candidate_first_name}} in your template.
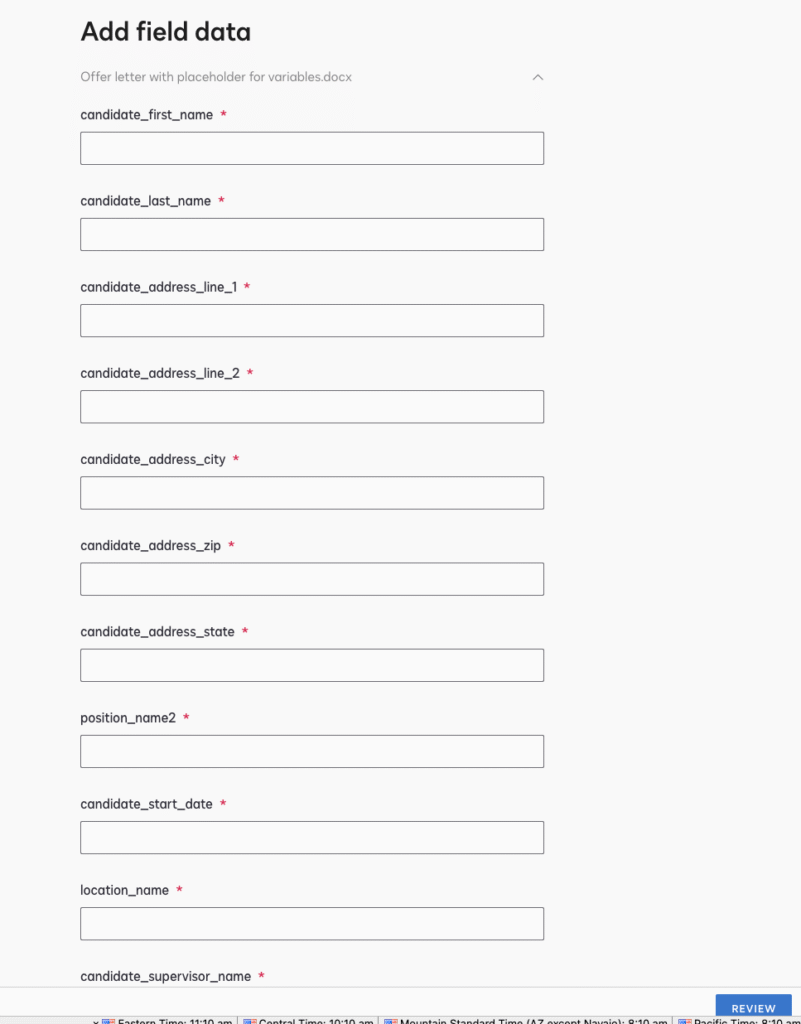
Input the information directly in Docusign manually
Preview the document to ensure all placeholders are correctly replaced with the intended data before sending it for signatures. This method is useful for small batches of documents or when you need to make last-minute adjustments.
Automate Document Generation
For a more efficient workflow, integrate your data source with your Docusign template. You can connect Excel, Google Sheets, or a CRM like Salesforce. This automation allows you to generate documents with a single click, reducing manual errors and saving time. By setting up a seamless integration, you can ensure that your data is always up-to-date and accurately reflected in your documents. Automation also helps in handling large volumes of documents, making the process more scalable.

Integrate your data source with Docusign using Excel, Google Sheets, or Salesforce
Best Practices for Mail Merge
Ensure your data is accurate to avoid errors in the final document. Regularly update and validate your data sources. Maintain consistency by using standardized templates and placeholders. These practices will help you achieve reliable and professional results. Additionally, it’s important to conduct regular audits of your templates and data sources to ensure that everything remains up-to-date and compliant with any relevant regulations.

Track The Document Status
Docusign provides tools to track the status of your documents. You can monitor whether documents have been signed, sent, or if there are any issues such as incorrect email addresses.
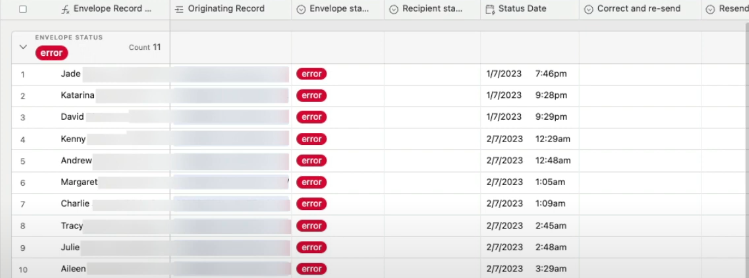
Track document status for signatures, delivery, and errors like incorrect email addresses
This tracking capability is essential for managing large volumes of documents efficiently. By leveraging Docusign’s tracking tools, you can ensure timely follow-ups and address any issues promptly, enhancing overall efficiency.
Docusign Plans and Access
Docusign’s document generation feature is available on enhanced or enterprise plans. If you have a lower-tier plan, consider upgrading to access this feature.
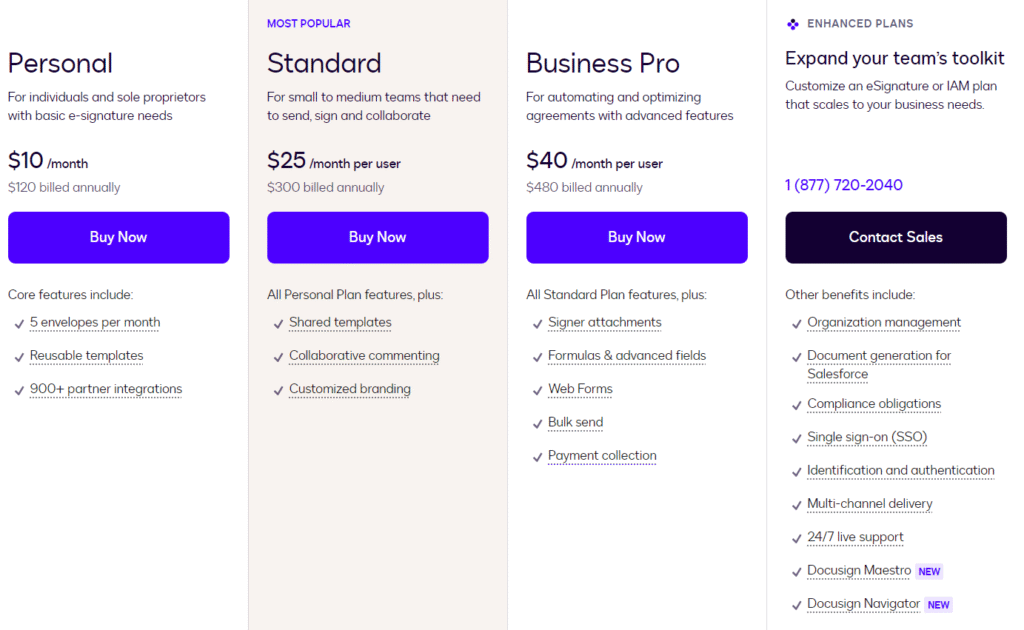
Alternatively, explore other solutions like Docupilot. Understanding the different plan options and their features can help you choose the best solution for your needs, ensuring you get the most out of your investment in Docusign.
Alternative Solutions: Docupilot
If you cannot access Docusign’s document generation feature, Docupilot is a viable alternative.
Use Docupilot if Docusign’s document generation is unavailable
It offers similar functionality, allowing you to create and send mail merge documents. You can configure Docupilot to work seamlessly with Docusign, ensuring a smooth workflow. Docupilot provides robust integration capabilities, making it a flexible and powerful tool for document generation.
Configure Docupilot with Docusign for a smooth workflow
Conclusion
Generating mail merge documents directly within Docusign is a powerful capability that simplifies document creation and management. By following the steps outlined in this article, you can achieve polished, personalized documents without relying on third-party software. This integration not only saves time but also enhances accuracy and efficiency, making it an invaluable tool for businesses. Embracing these advanced features will help you streamline your document workflows, improve productivity, and deliver a better experience to your clients and stakeholders.
To take full advantage of Docusign’s mail merge capabilities and transform your document management process, book a consultation with Solusign. Our experts are ready to assist you in optimizing your workflows, ensuring you get the most out of your Docusign investment.