DocuSign Bulk Send: Easy Step By Step in 2024 Tutorial [VIDEO GUIDE]
Jul 09, 2024![DocuSign Bulk Send: Easy Step By Step 2021 Tutorial [VIDEO GUIDE]](https://kajabi-storefronts-production.kajabi-cdn.com/kajabi-storefronts-production/file-uploads/blogs/2147496320/images/833daf2-e3fa-2ed-36b6-6b5add0dccc2_maxresdefault_6_.jpg)
Table of Contents
-
Introduction
- What is DocuSign Bulk Send?
-
How does DocuSign bulk send work?
- Example Scenario
- Manual Upload vs. API Integration
-
How to use DocuSign Bulk Send
- Prerequisites
- DocuSign Business Pro or Enterprise subscription
- DocuSign Template
- CSV or Cloud Database (Airtable, Google Sheets, etc.)
- Prerequisites
-
Step-by-Step Guide
- Step 1: Set up your Template
- Assigning Roles to Recipients
- Step 2: Add "merge fields" (optional)
- Customizing Documents for Signers
- Step 3: Customize your DocuSign fields data labels
- Renaming Field Labels
- Adding Labels to Fields
- Step 4: Download the DocuSign Bulk Send CSV Template
- Locating and Using the Template
- Step 5: Fill out the CSV
- Inputting Recipient Information and Prefill Data
- Step 6: Upload the CSV
- Uploading, Reviewing, and Sending
- Step 1: Set up your Template
-
Advanced Tips and Solutions
- Better Tracking and Document Management
- Integrating Database with DocuSign for Enhanced Efficiency
-
Conclusion
- Scheduling a Consultation
- Exploring Advanced Integration Options
What is DocuSign Bulk Send?
Running an organization where you must send the same document to different recipients in separate envelopes? The DocuSign bulk send feature is a highly efficient way to get files to recipients in no time.
Similarly to how you would use the BCC functionality when sending an email, you can send documents in batch to multiple recipients instead of manually creating separate envelopes.
How does DocuSign bulk send work?
Let's say you need to collect signatures from 10 people (not 10 signatures on the same document, but 1 signature on 1 document for 10 people)
With DocuSign bulk send, you have the ability to manually upload data in CSV format or via API (API is a much better option; more on this in a bit)
The 10 recipients will receive a unique copy of the document, and each document will have unique data "merged" onto it. And, of course, your recipients won't know the documents were sent in bulk. Makes sense?
If it's a little confusing and you'd like our help setting this up, you can schedule a consultation with our DocuSign experts here. If you want to learn how to do it yourself, keep reading!
How to use DocuSign Bulk Send
Before we get started on showing you how to send bulk files in DocuSign, you’ll need to ensure you have the following:
- A DocuSign Business Pro or Enterprise subscription
- A DocuSign Template
- A CSV or a cloud database (Airtable, Google Sheets, etc)
Step 1: Set up your Template
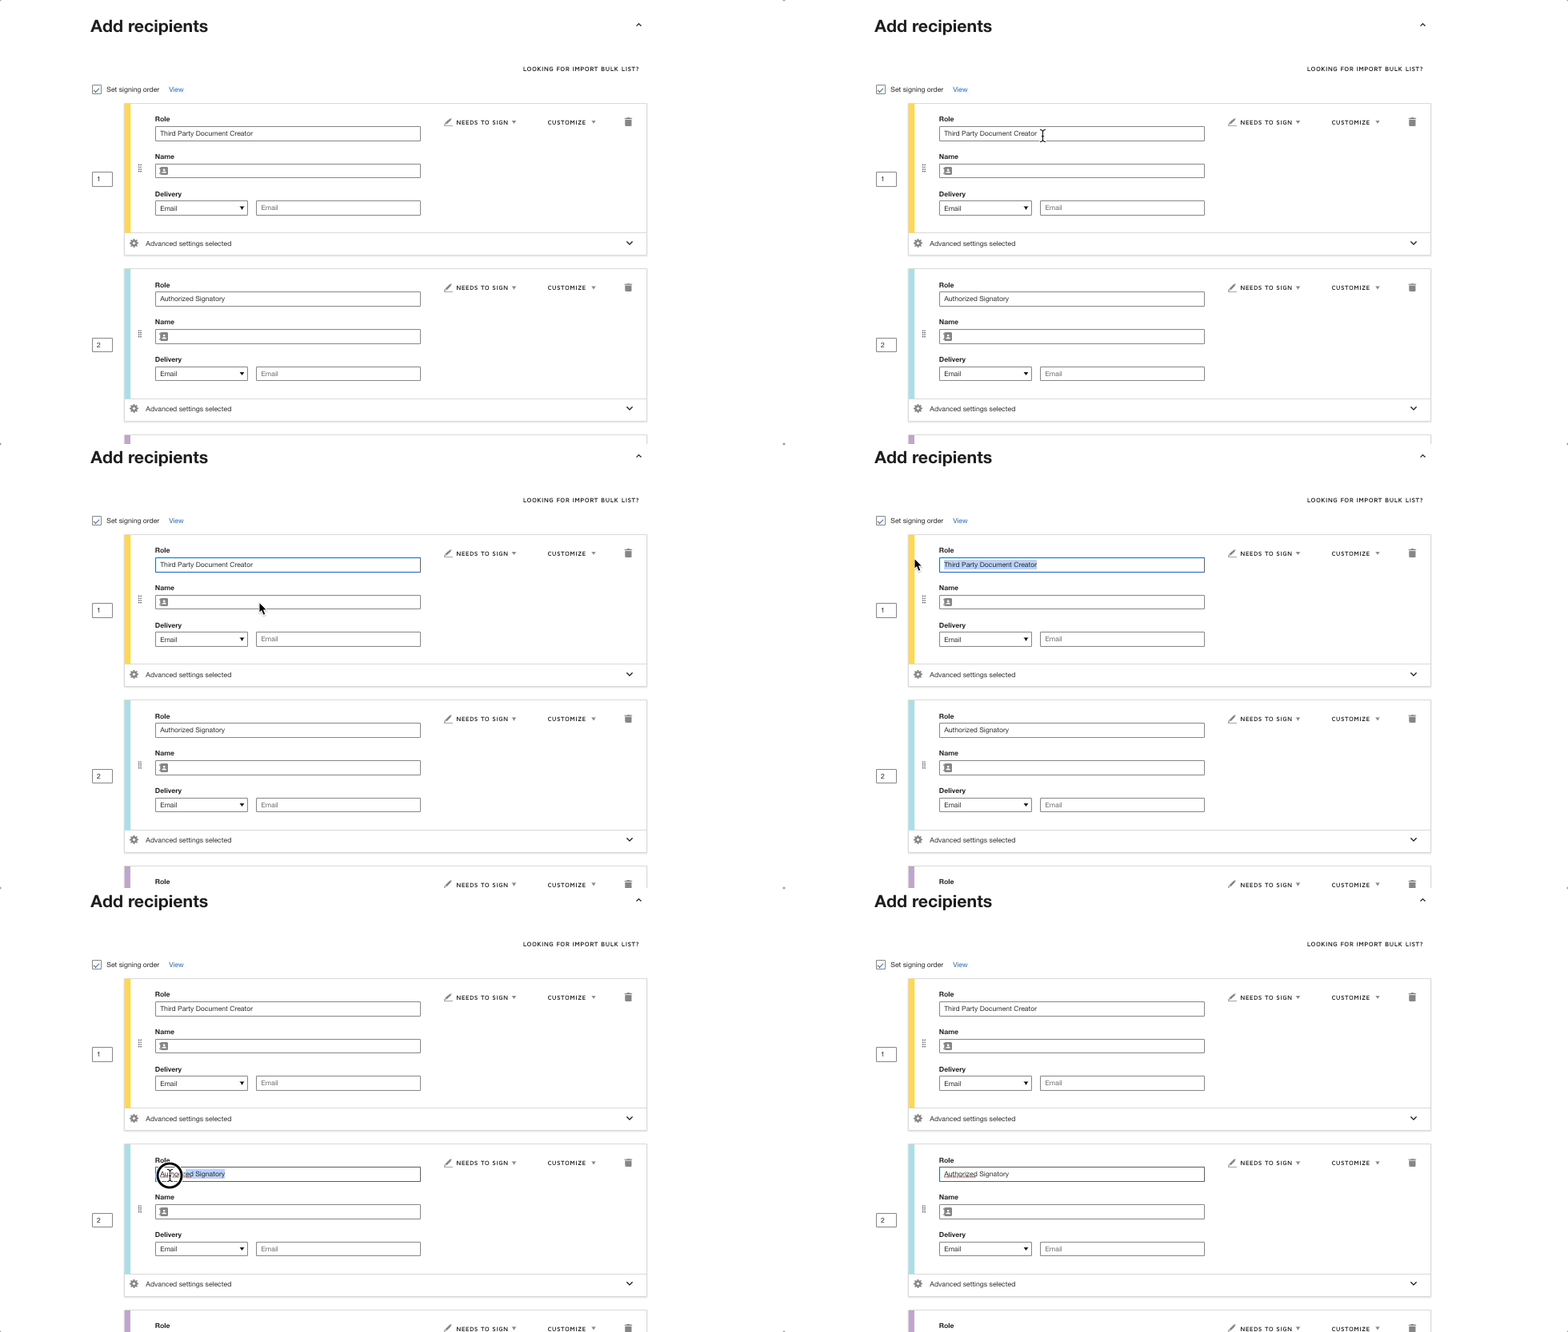
Firstly, you’ll need to assign a role to all of the recipients of your template.
All recipients will need to be given a placeholder role. If you miss this step, you won’t be able to map your recipient’s names and emails to the relevant recipient in DocuSign. Make sure that the 'Role' field is filled out for all your recipients like we've done below:
Step 2: Add "merge fields" (optional)
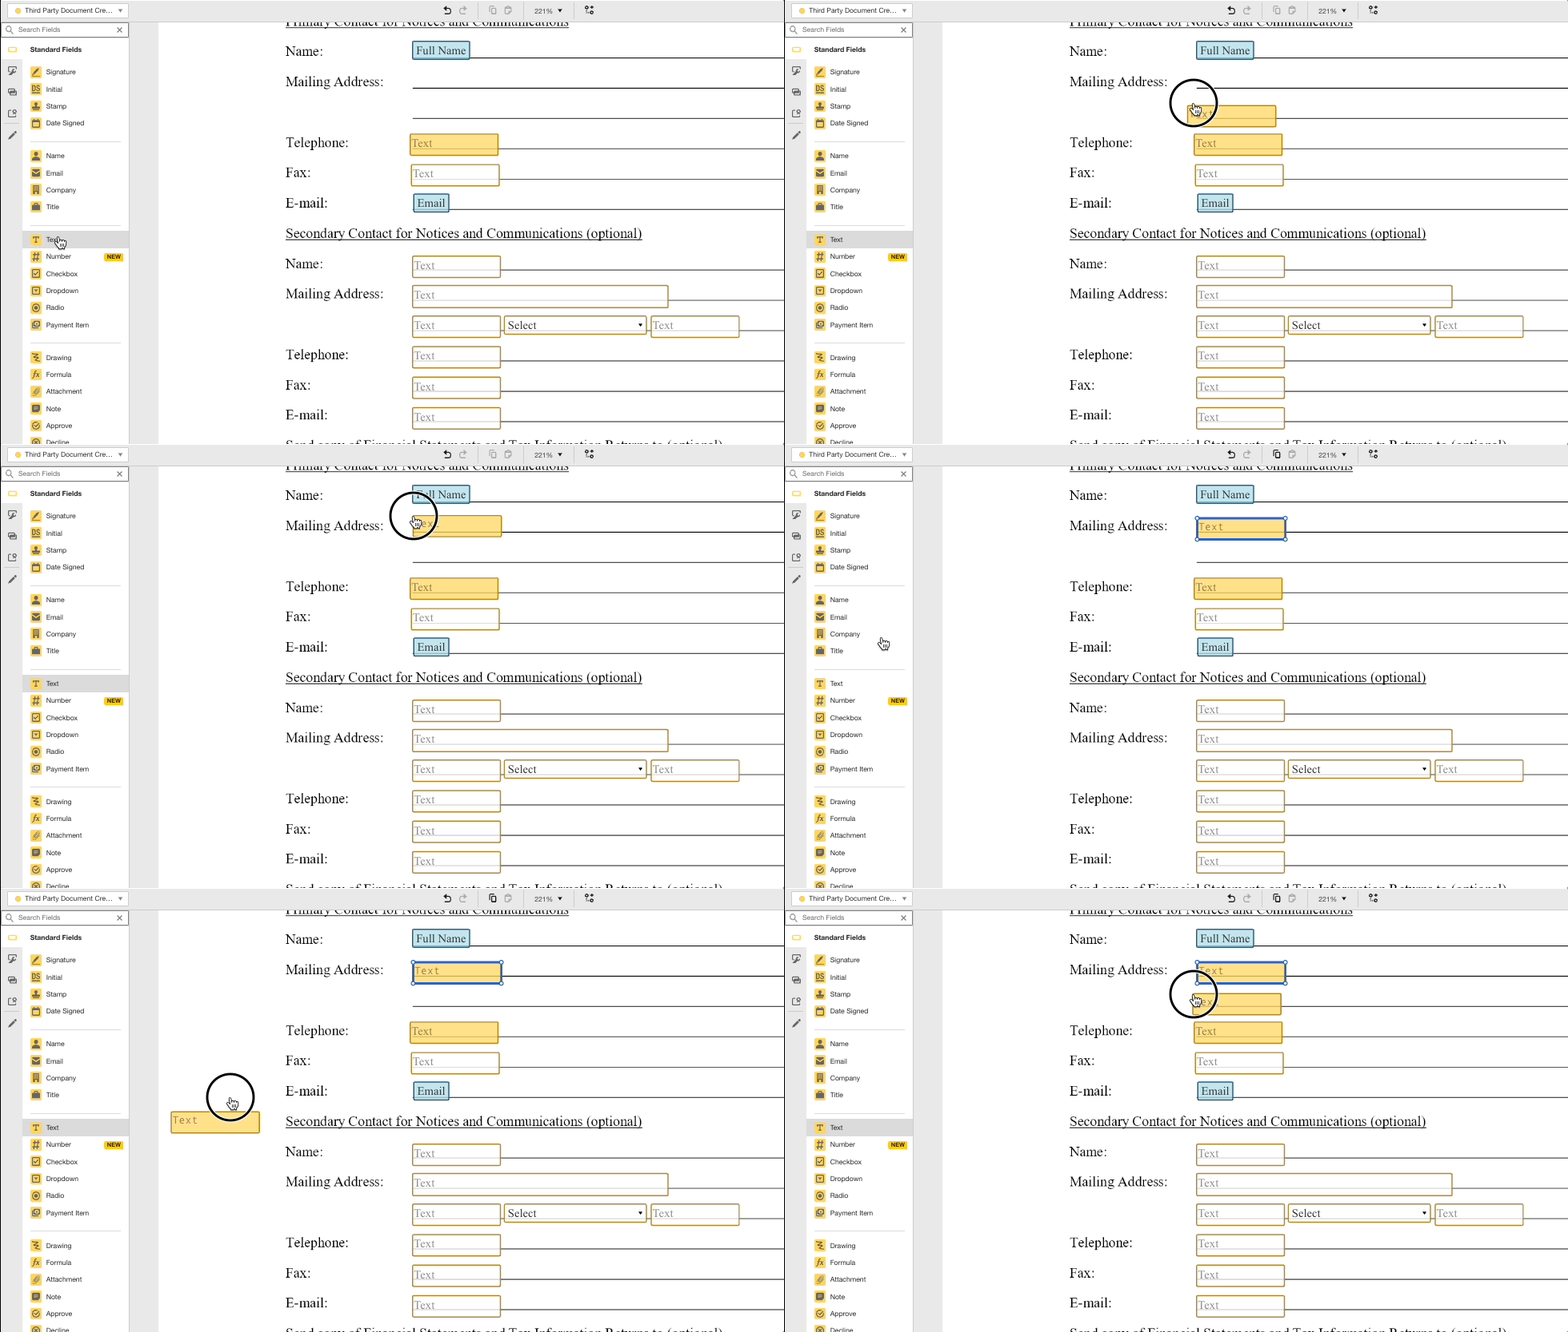
If you want to want to customize the document before they're received by your signers, add fields in the template and assign them to the relevant recipient.
You can prefill text, dropdowns, checkboxes, and radio button fields. Don't forget to make these fields 'Read-only' in case you don't want your recipients to be able to edit the content of these fields.
Step 3: Customize your DocuSign fields data labels
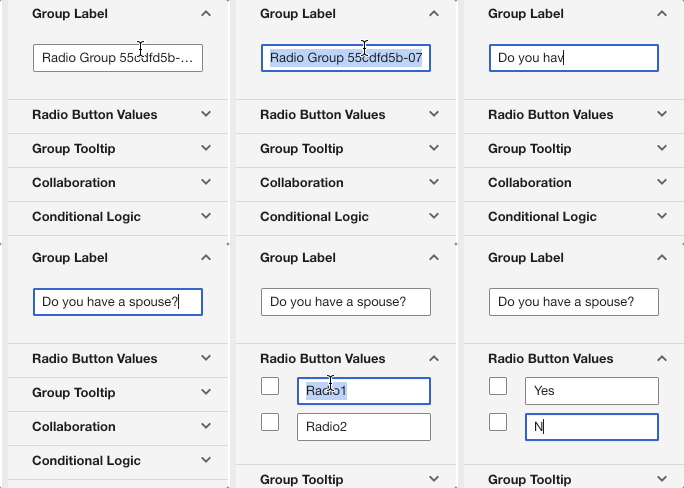
Whenever you want to prefill DocuSign fields with information, you need to rename those field labels by giving them a meaningful name. This will allow you to map your information to fields more easily. If you don't rename your field labels, it will be very hard for you to map the data.
You will be able to add labels to most fields, including text boxes, radio buttons, checkboxes, drop-downs, and notes. It’s important to note that adding labels to radio buttons and checkboxes will allow you to check the right box or radio button from your CSV file. For this, you need to rename the Group Data Label as well as each Radio Button Value.
Once you've renamed all the fields you want to prefill, save and close the template.
Step 4: Download the DocuSign Bulk Send CSV Template
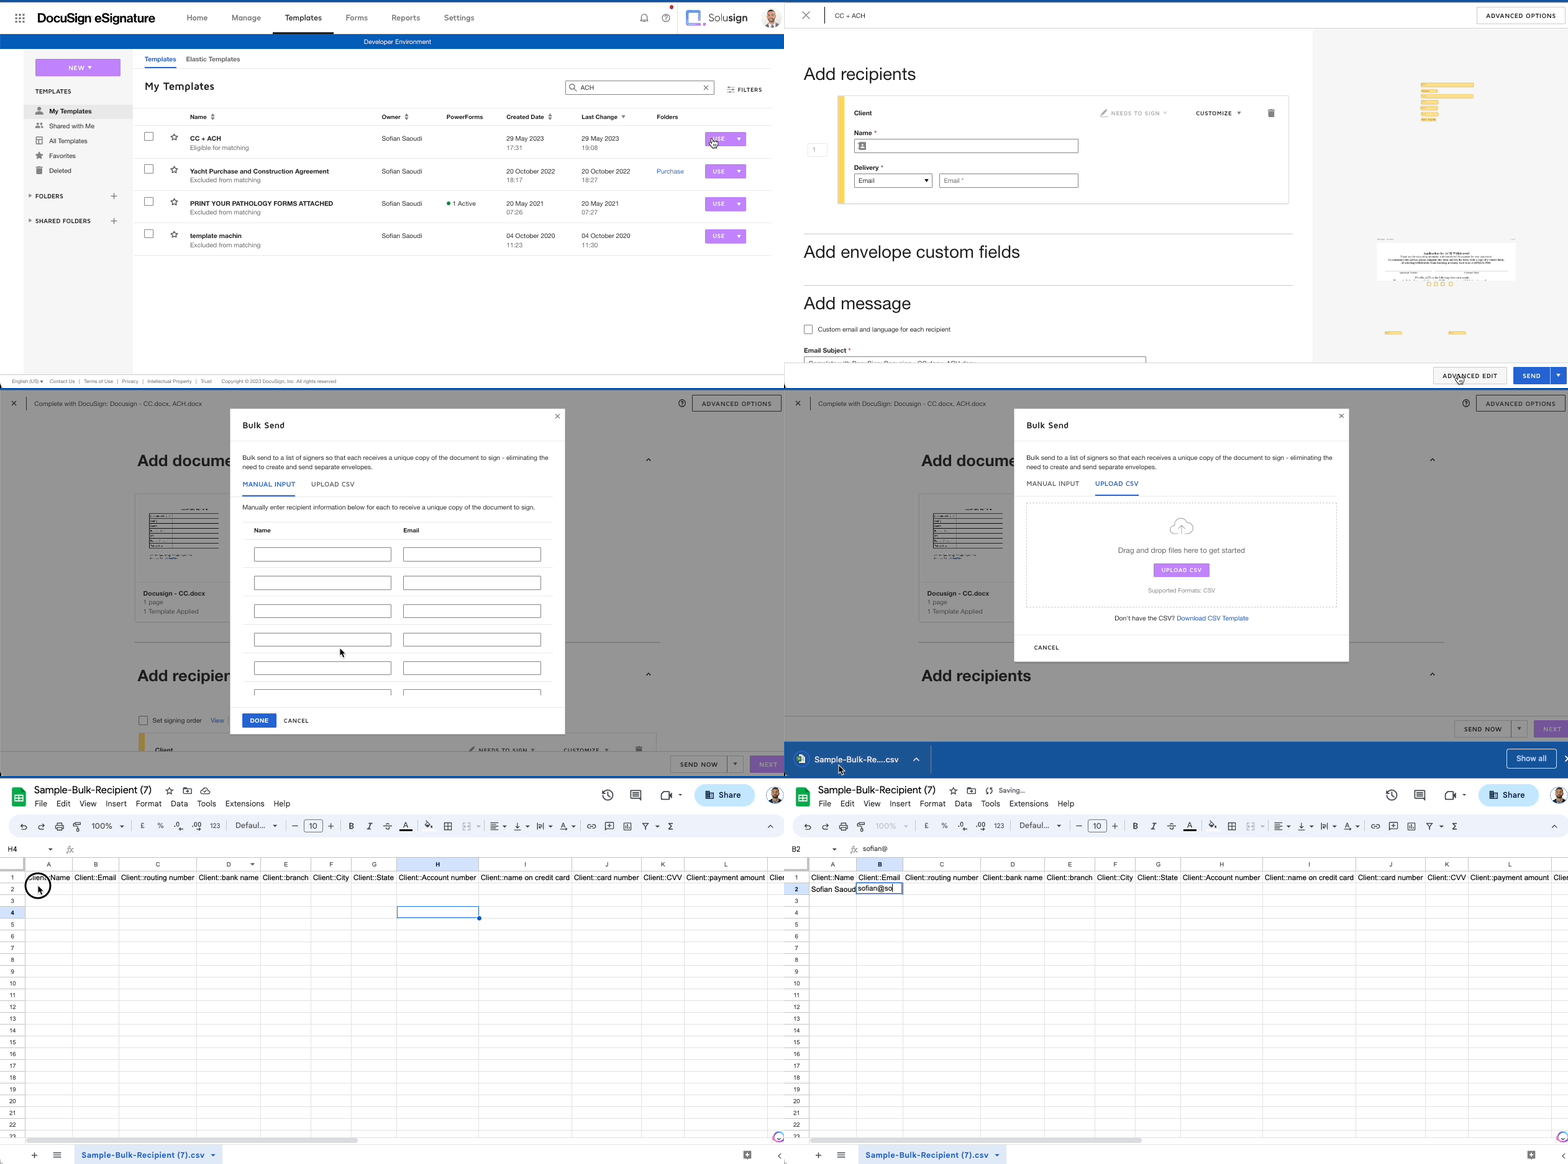
- Head to the Templates page, locate the template you want to use
- Click ‘Use’.
- Click ‘Advanced Edit’
- Click 'Bulk Send'
- Enter recipient name and emails manually or download the CSV template
- Don't close the DocuSign screen
Step 5: Fill out the CSV
Next, you’ll need to fill out the CSV with the name and email of your recipients and, optionally, add the information you want to prefill your documents with.
Here’s how the CSV works:
- Each row represents a separate envelope, and each column represents a field in the envelope.
- Starting from the left, the headers correspond to your recipient’s names and emails, followed by the various fields you may choose to prefill.
Step 6: Upload the CSV
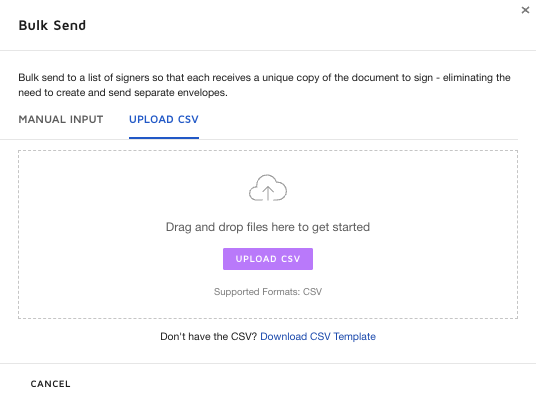
The final step will require you to upload the CSV to DocuSign.
- Return to the DocuSign screen you downloaded the CSV template from
- Upload the CSV
- Review the data
- Click Send
Learn how to do a better bulk send in DocuSign and more today
While DocuSign Bulk Send is a great way to save time, it's very difficult to keep track of who has signed, and saving completed documents in folders is very labour-intensive.
As Solusign, we've developed a solution that allows you to integrate your database with DocuSign to do your bulk send in just a few clicks and automate manual tasks.
You can schedule a call with us today to assist you with your CSV bulk send or explore more advanced integration options.


